Serstech Arx and Arx mkII FAQ
Below we have collected the most common questions about Serstech Arx and Arx mkII. If you cannot find the answer you are looking for below, please contact our support team to get help. Click on a question to see its answer.

INTRODUCTION
What is Raman spectroscopy?
Raman Spectroscopy is a non-destructive chemical analysis technique that enables chemical identification and verification, as well as screening. The substance molecules interact with the light photons from a laser in the visible, near infrared, or near ultraviolet range. The laser light interacts with molecular vibrations, phonons, or other excitations in the system, resulting in the energy of the laser photons being shifted up or down, called as inelastic scattering, or Raman scattering, of monochromatic light. The shift in energy gives information about the vibrational modes in the system and the resulting spectral read-out is like a molecular fingerprint. It is unique to the specific substance and it is called the Raman spectrum.
As part of our solutions, Serstech offers Raman spectroscopy instruments called “Arx”.
How does Raman spectroscopy compare with other methods for chemical identification?
Compared to other methods of chemical identification, e.g. FTIR, Mass spectrometer, NIR, etc. Raman spectroscopy offers quick and non-destructive chemical identification. It even works through transparent packaging like glass and plastic. It is a quick identification method that can be used by anyone.
What can you analyse with our Raman Spectrometer?
It can be used to analyze many different substances. Here are some examples:
- Powders, pills, solids, minerals and fluids
- Inorganic as well as organic materials
- Pure chemicals, mixtures, and solutions
What can’t you analyse with Serstech Raman Spectrometers?
- Black or dark-colored samples
- Biological samples (Blood, urine, saliva)
- Gases or vapors
- Through opaque or thick containers
- Radiation
TECHNICAL DETAILS
What is the spectral range of the instrument?
Spectral range is 400-2300 cm-1 with a spectral resolution of 8-10 cm-1.
This spectral range is called the fingerprint range which contains all the relevant spectral information to identify a substance. In some cases, there is spectral information outside of this range, but it is typically not needed to make an identification. With our algorithm, the data within this range provides comprehensive information for substance identification.
What is the weight and size of the instrument?
Weight: 590 g (1.3 lb.), Size: 160 mm x 85 mm x 28 mm (6.2 x 3.3 x 1.1”)
Is the battery rechargeable, and what is the capacity?

The battery is rechargeable and it takes approximately two hours to charge the battery if you use the supplied charger. The battery then lasts more than 12 hours of typical use, i.e. more than a normal working day. The instrument can be charged from any USB charger, a computer or an external power bank.

You can extend the battery indefinitely by using mobile power banks, the same type that is used with mobile phones. By using a mobile power bank, you can continue using the instrument without interruption and without the need for replacing batteries.
Additionally, you have the flexibility to adjust settings in the Setting section to optimize battery consumption according to your preferences.
Can I use the Serstech instruments in rough conditions?
Yes, the Serstech instruments can be used to identify chemicals in hot, cold, humid, wet, unstable or shaky conditions, so you can safely rely on the instrument. Approvals: CE, IEC 60529 IP67, MIL-STD-810G 514.6 (vibration), MIL-STD-810G 516.6 (functional shock)
Under what temperature conditions does Serstech Arx operate?
Serstech instruments have full operational capacity within the temperature range of -20 to +50°C but can operate outside these limits.
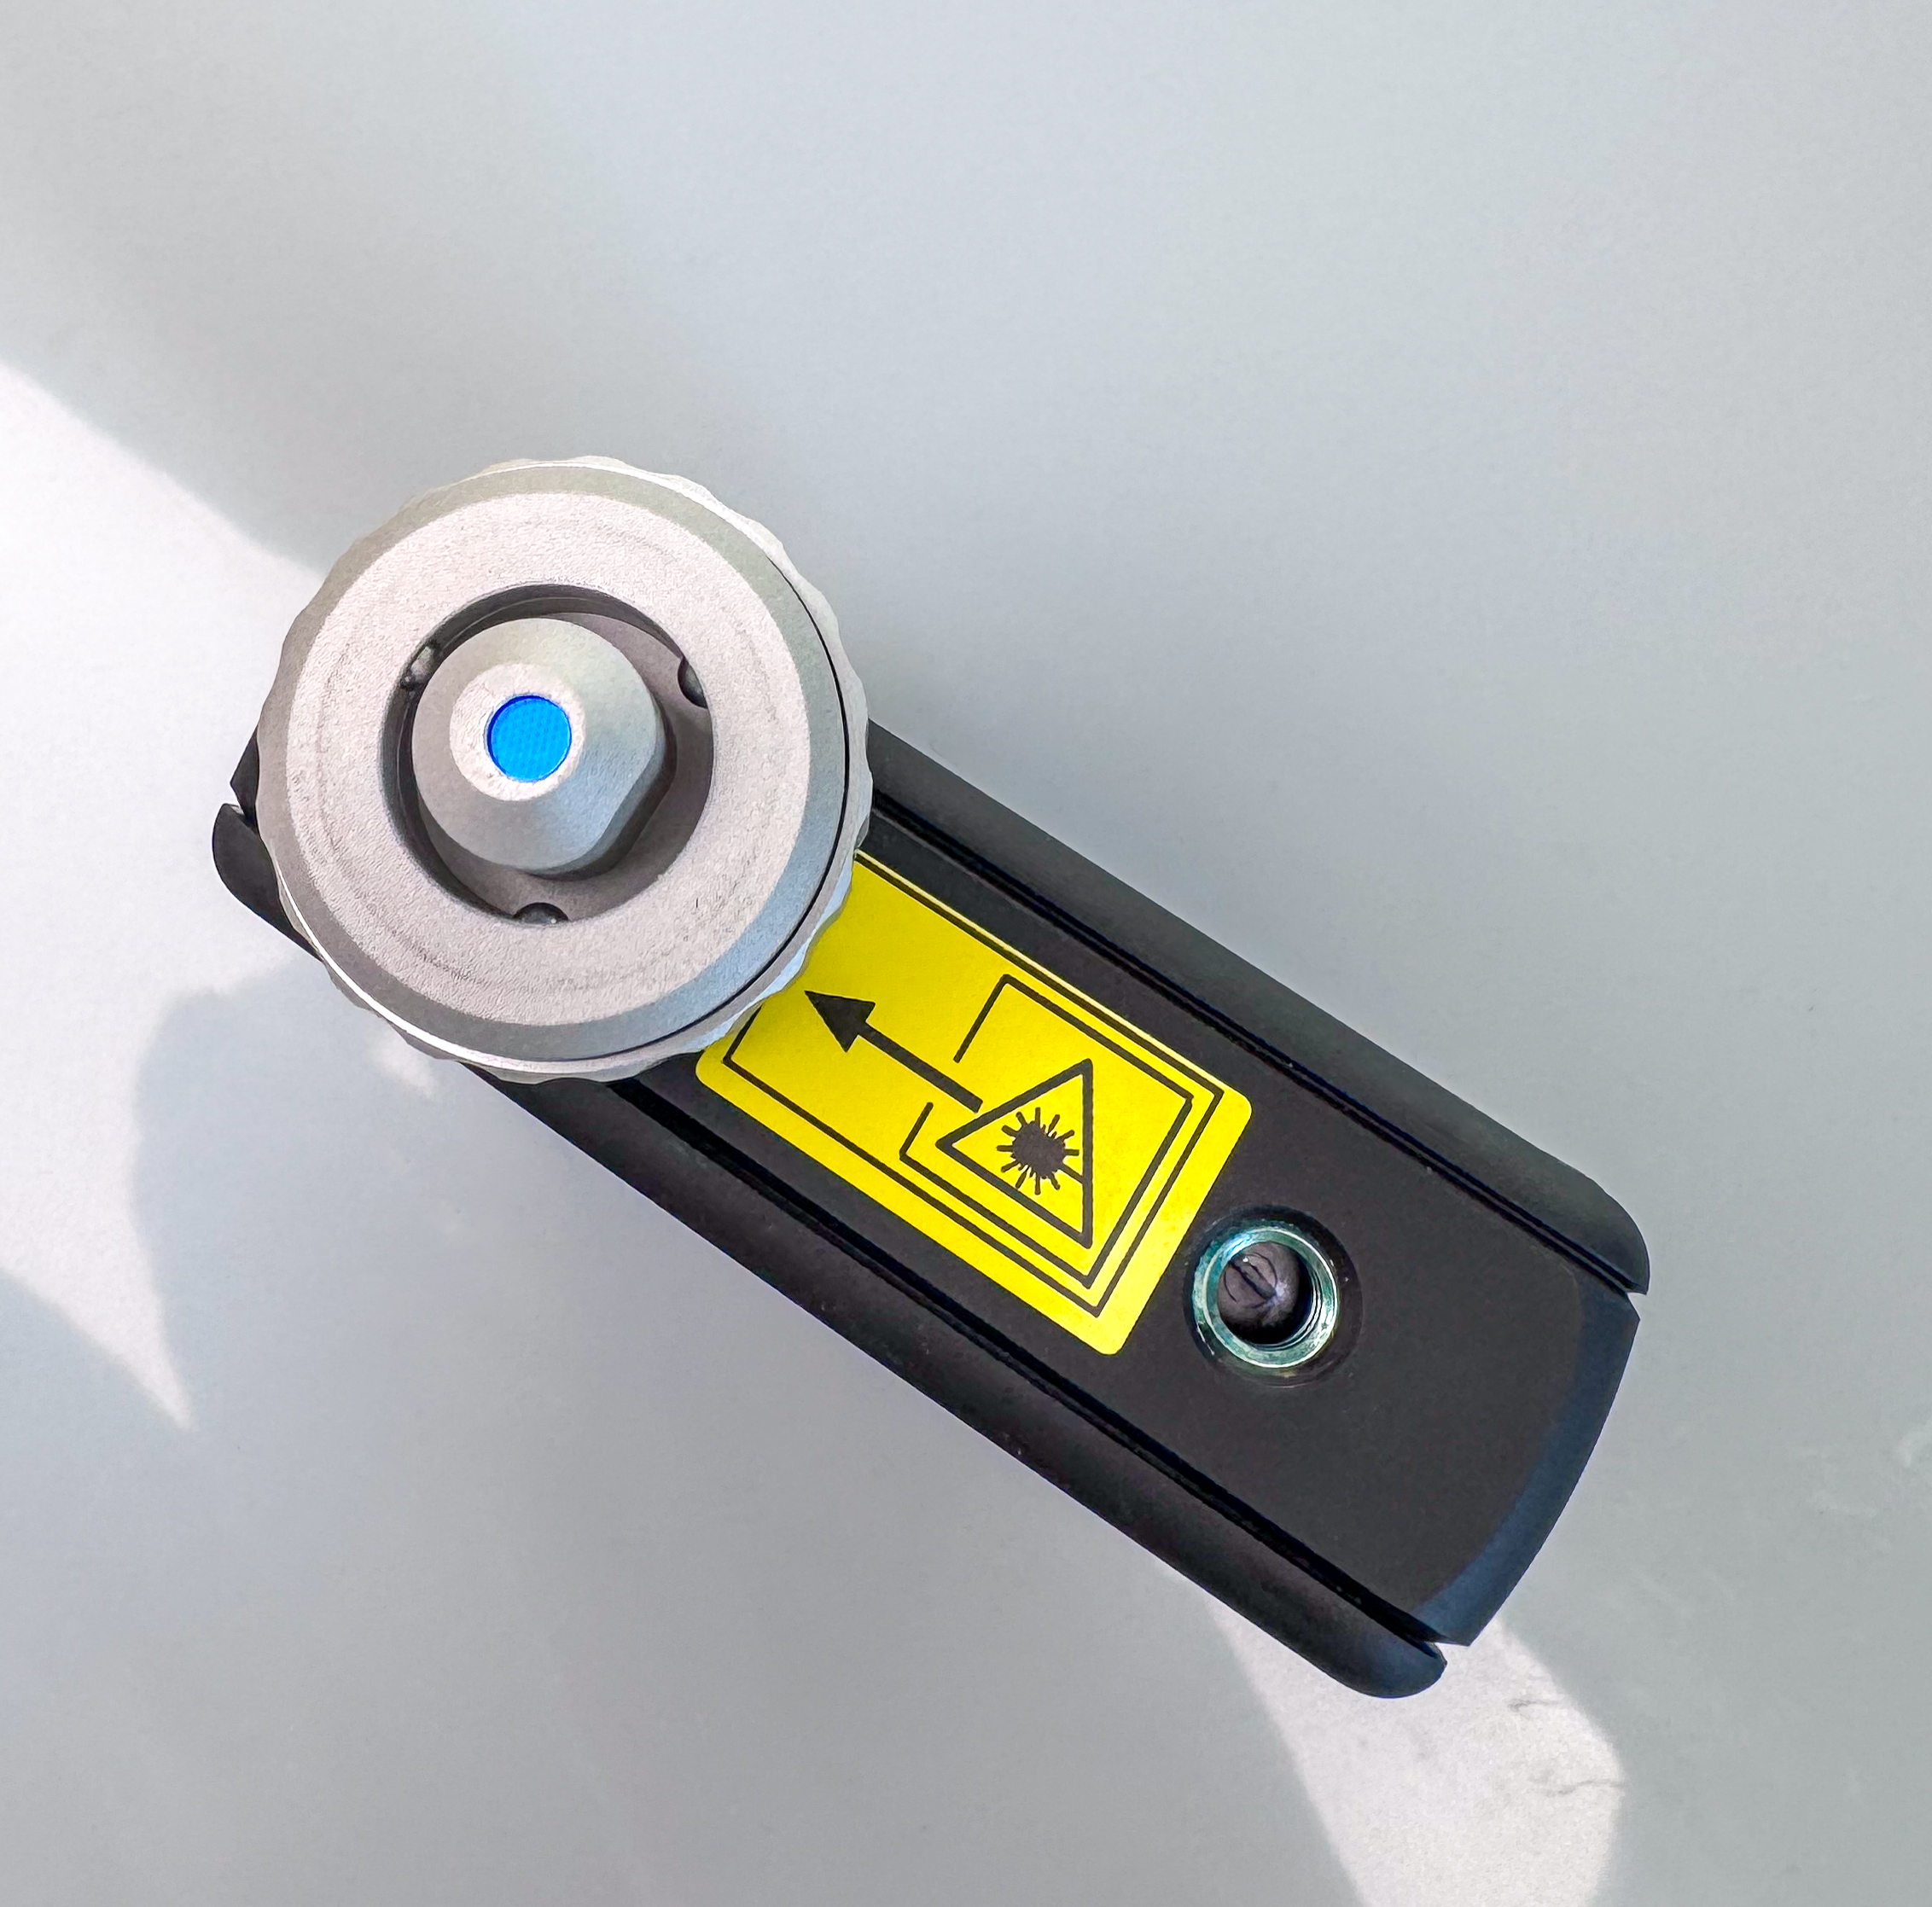
Is there a laser in the instrument, and what type of safety precautions must be taken?
The Serstech Arx uses a 785 nm laser with maximum output effect of 300 mW. It is a Class 3B laser product and complies with EN 60825-1:2007. You should never direct the beam towards other people or into areas where other people may be. Refer to the International standard EN 60825-14 user’s guide for guidance on identifying and controlling hazards associated with laser use. It is recommended to maintain a safety distance of 1 meter (3 feet) from the aperture.
How can I process the data obtained from the instrument?
You can process the data obtained from the instrument through our software ChemDash, where you have the option to create detailed reports and extract data in various formats such as txt, csv, jcamp, and dx.t These exported files can then be further processed in any third-party software compatible with the export formats.
What is the data storage capacity for Serstech Instruments?

Serstech instruments is equipped with 30 GB memory. This is large enough for more than 100 000 measurements.
MEASUREMENTS
How does the Quick scan method work?
The Quick Scan feature is a commonly used and simple technique for conducting efficient measurements. It includes three variations designed for various types of containers by adjusting focus positions. This ensures an optimal approach for different materials, allowing precise measurements when using the appropriate setup.
Thin or none: Used for none or very thin, transparent materials containing a sample. Place the instrument directly on a pill or on the zip bag with the substance.
Focus position: 0.0 mm
Medium: Used for the including transparent vials or similar thickness of sample holders.
Focus position: 2.15 mm
Thick: Used when scanning with all the different adapters included in the kit, as well as thicker transparent sample holders like glass or plastic vials.
Focus position: 3.65 mm
Experience Quick Scan in action, identifying substances here.
What should I do if the measurement result shows a very low match or deviates from the expected outcome?
In cases where the measurement result shows a very low match or deviates from the expected outcome, there are a few factors to consider for more accurate results.
Substance Quantity and Aging: If the quantity of the Raman-active substance being measured is too scant, accurate analysis might be compromised. Additionally, substances that have aged significantly might lose their activity, resulting in a weak analysis signal.
Variation in Scanning: To enhance accuracy, we recommend trying to scan the substance again. Changing the measuring spot, especially if analysing in different areas, could lead to more reliable results as well as increase the number of scan repeats.
Small volume Adaptor: If dealing with a small quantity of the substance, using the Small volume adaptor can significantly enhance accuracy.
Library Activation: Activation of relevant libraries is crucial to achieve a spectral match. Libraries containing the substance under analysis need to be activated prior to analysis. For identification the active libraries must contain the compound. If an initial result seems inaccurate, adjusting the libraries and conducting a rescan can significantly improve accuracy.
Library Inclusion: If the substance you are analysing is not found from Serstech’s libraries, a “No Match” outcome is expected. In such cases, you have the option to use the “Add to library” approach, incorporating the new substance into your personal library. This can be sent to the Arx through ChemDash for subsequent identification.
Raman Activity of the Substance: It is important to note that not all substances are Raman active and can produce meaningful spectra.
Clean lens: To achieve accurate results, it is essential to maintain a clean lens. Regularly inspect the lens for any dust or scratches. Use the lens pen, swab stick, or a small amount of isopropanol on a cotton swab to clean the inside of the lens. Watch the video tutorial how to clean the lens here.
What does it mean when I get a "No Match" result with Arx?
Several factors can contribute to a “No Match” result. Analyzing the obtained spectrum can offer insights into the underlying issues. It’s important to note that a “No Match” doesn’t necessarily mean the absence of material; it could be caused by a dirty lens, the absence of substance directly in front of the laser, the need to change the position slightly, adjustments in the focus position, or simply having the wrong library selected.
Here are some different spectrum scenarios you may encounter when receiving a “No Match” result:
The obtained spectrum does not contain any information. No sample present or the sample is not Raman active. 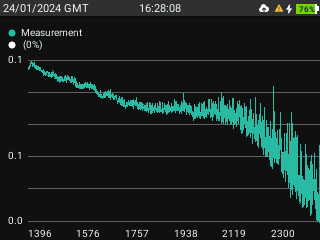
The signal originates from glass. Adjust focus to obtain signal from the sample. If glass signal persists the glass wall of the container may be too thick, and the sample has to be removed from container to be analysed. 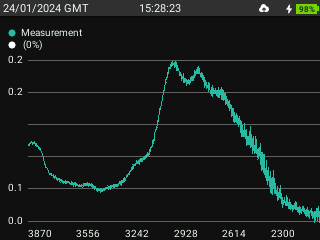
The obtained spectrum does not contain any information. No sample present or the sample is not Raman active. 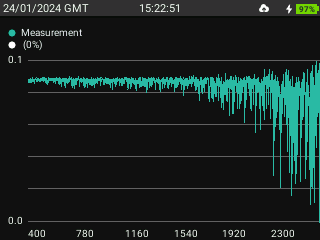
The slope indicates that that there is a disturbing signal from the sample that is called fluorescence. Fluorescence gives a strong background that does not allow the information from the sample (Raman spectrum) to be seen. 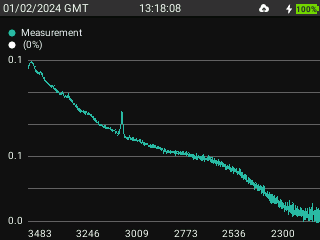
A spectrum with several well-defined peaks that is not identified is usually due to this substance not being present in the library used.
Does the instrument work through paper?
Although paper materials are inherently Raman active and generate strong signals, it’s important to be aware that the signal is significantly reduced when dealing with paper. This method is not recommended.
What is the minimum amount of liquid I can measure using the bottle adapter?
The vials available are 4 ml but one can measure as small as 400 μl of liquid.
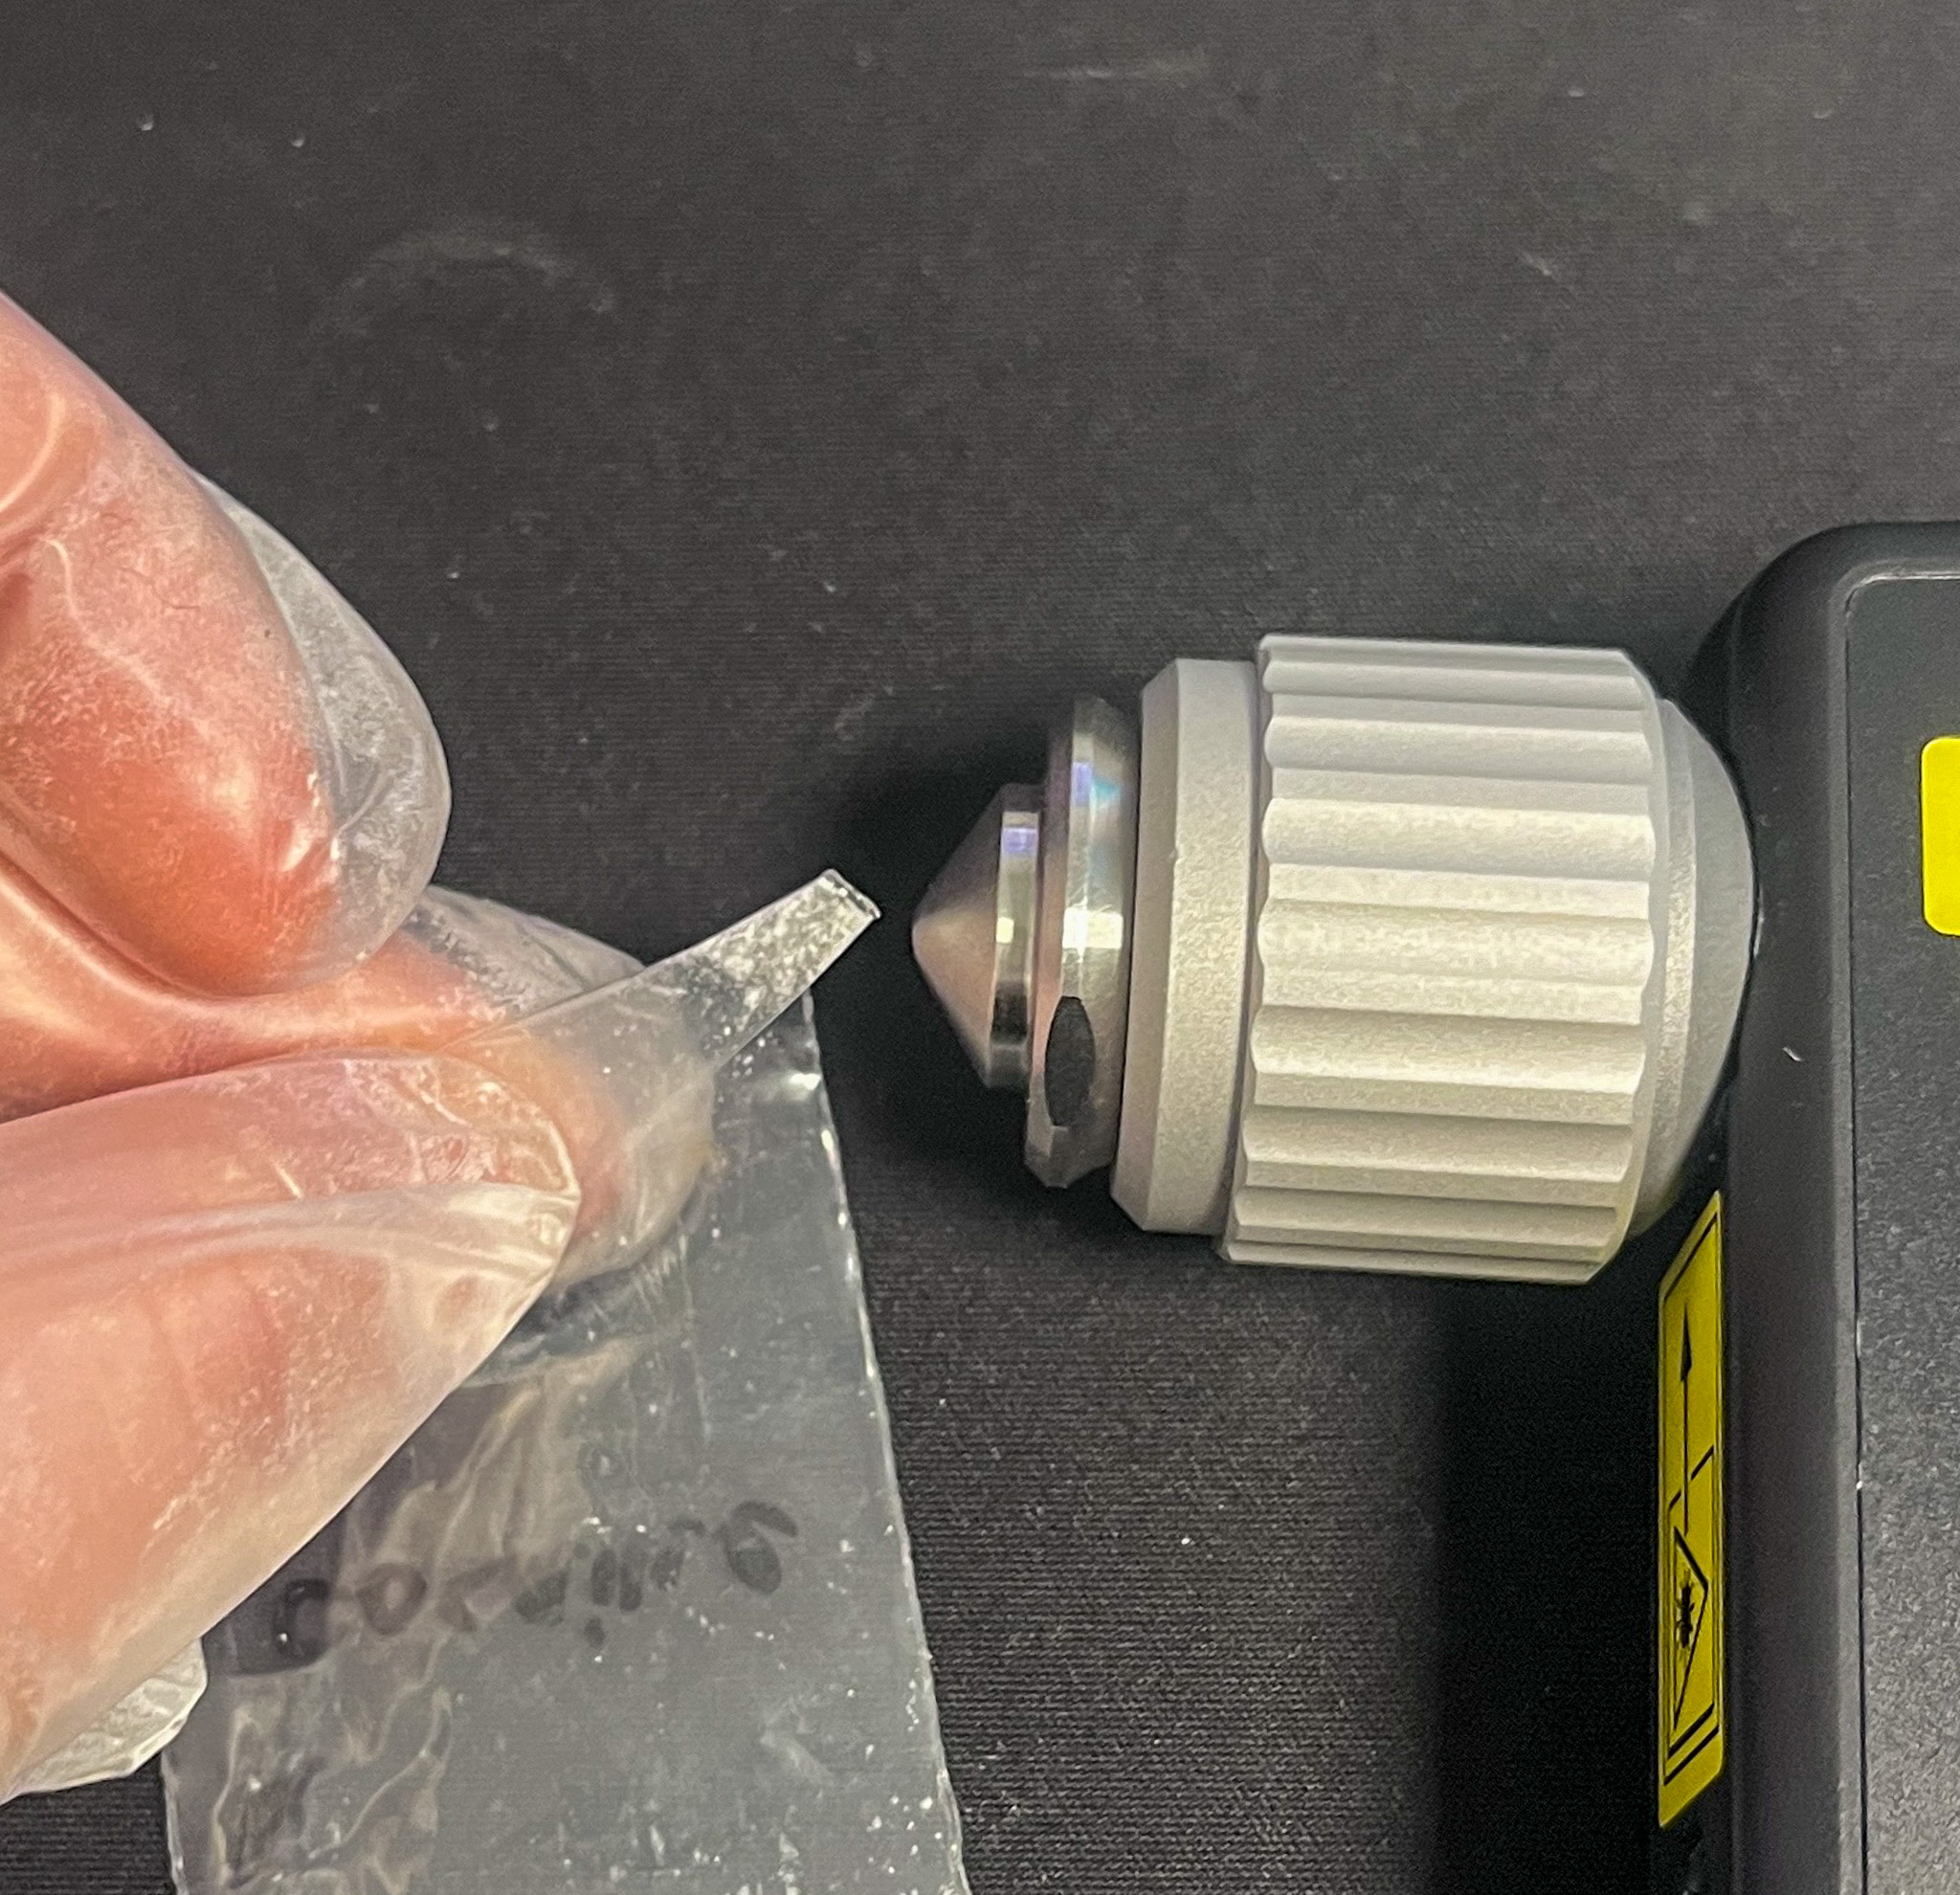
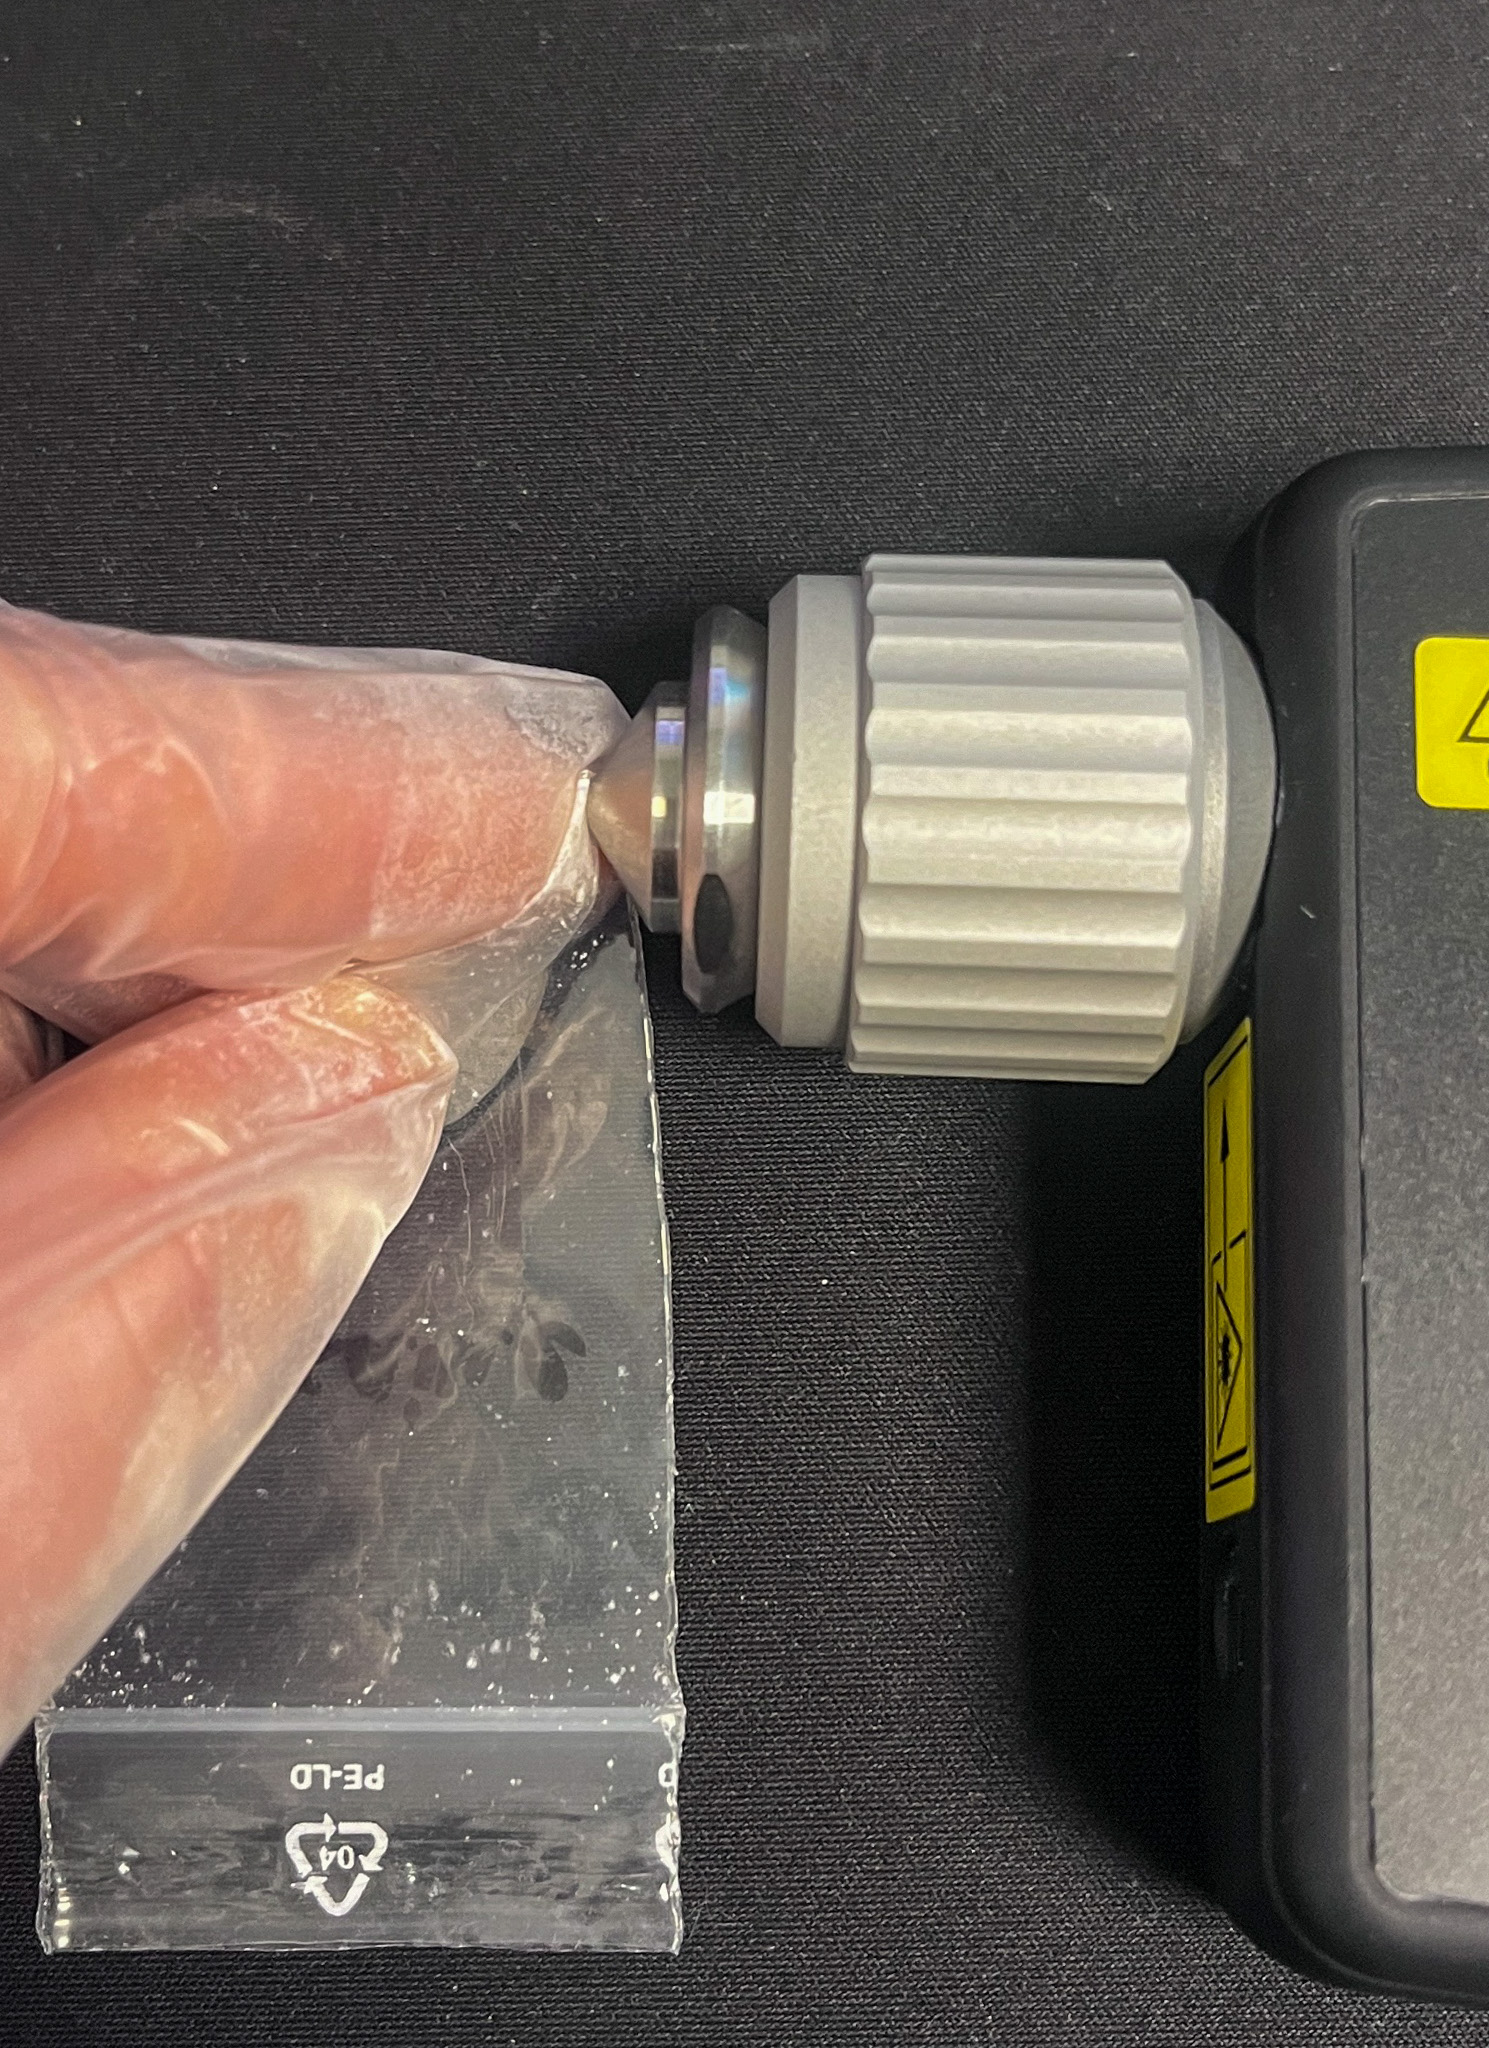
How can I prevent the Small Volume Adapter from missing the sample during analysis?
At times, the Small Volume Adapter may miss the sample. To avoid this, follow these steps:
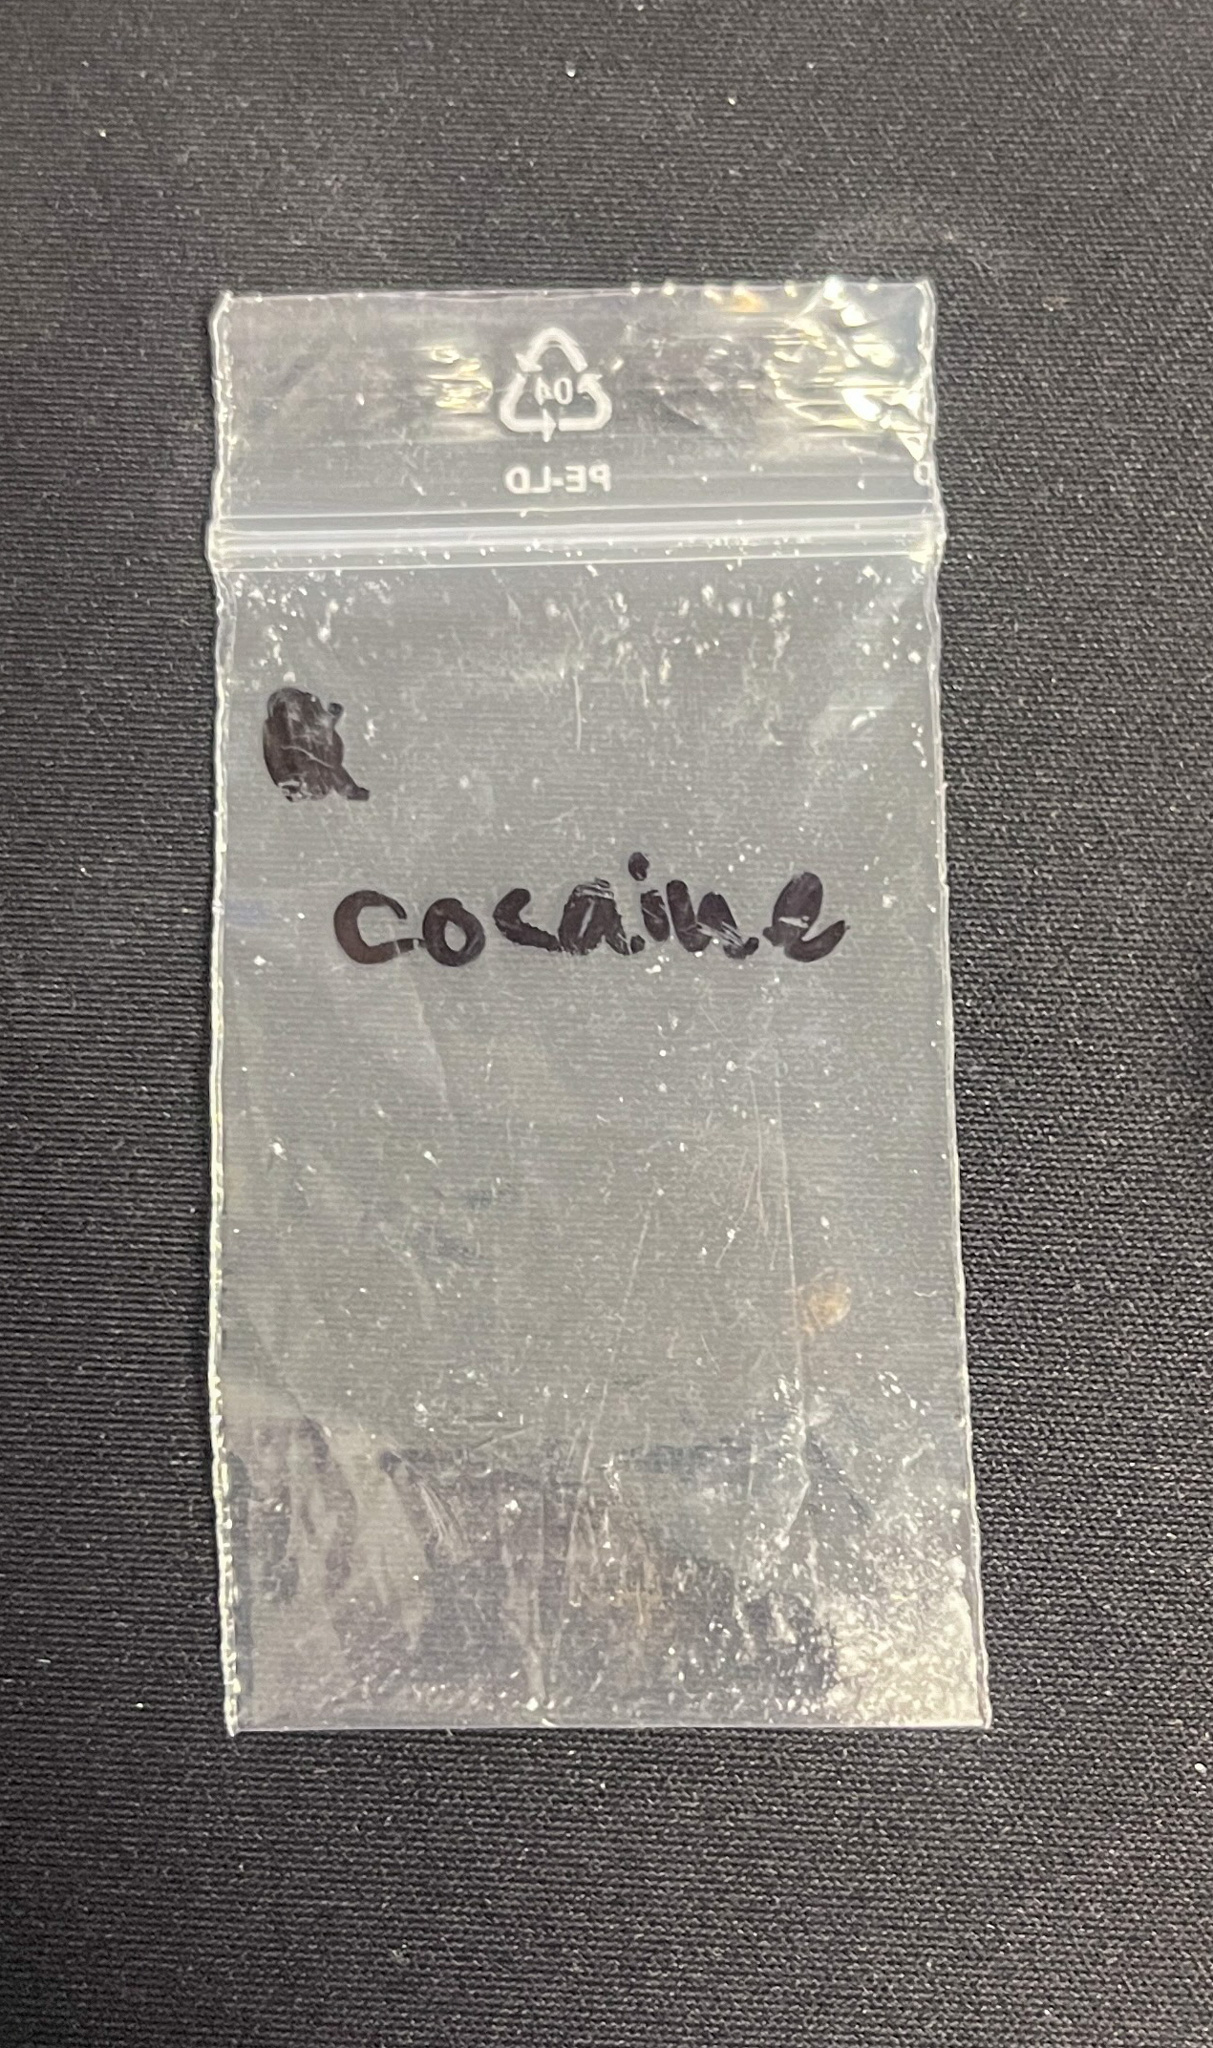
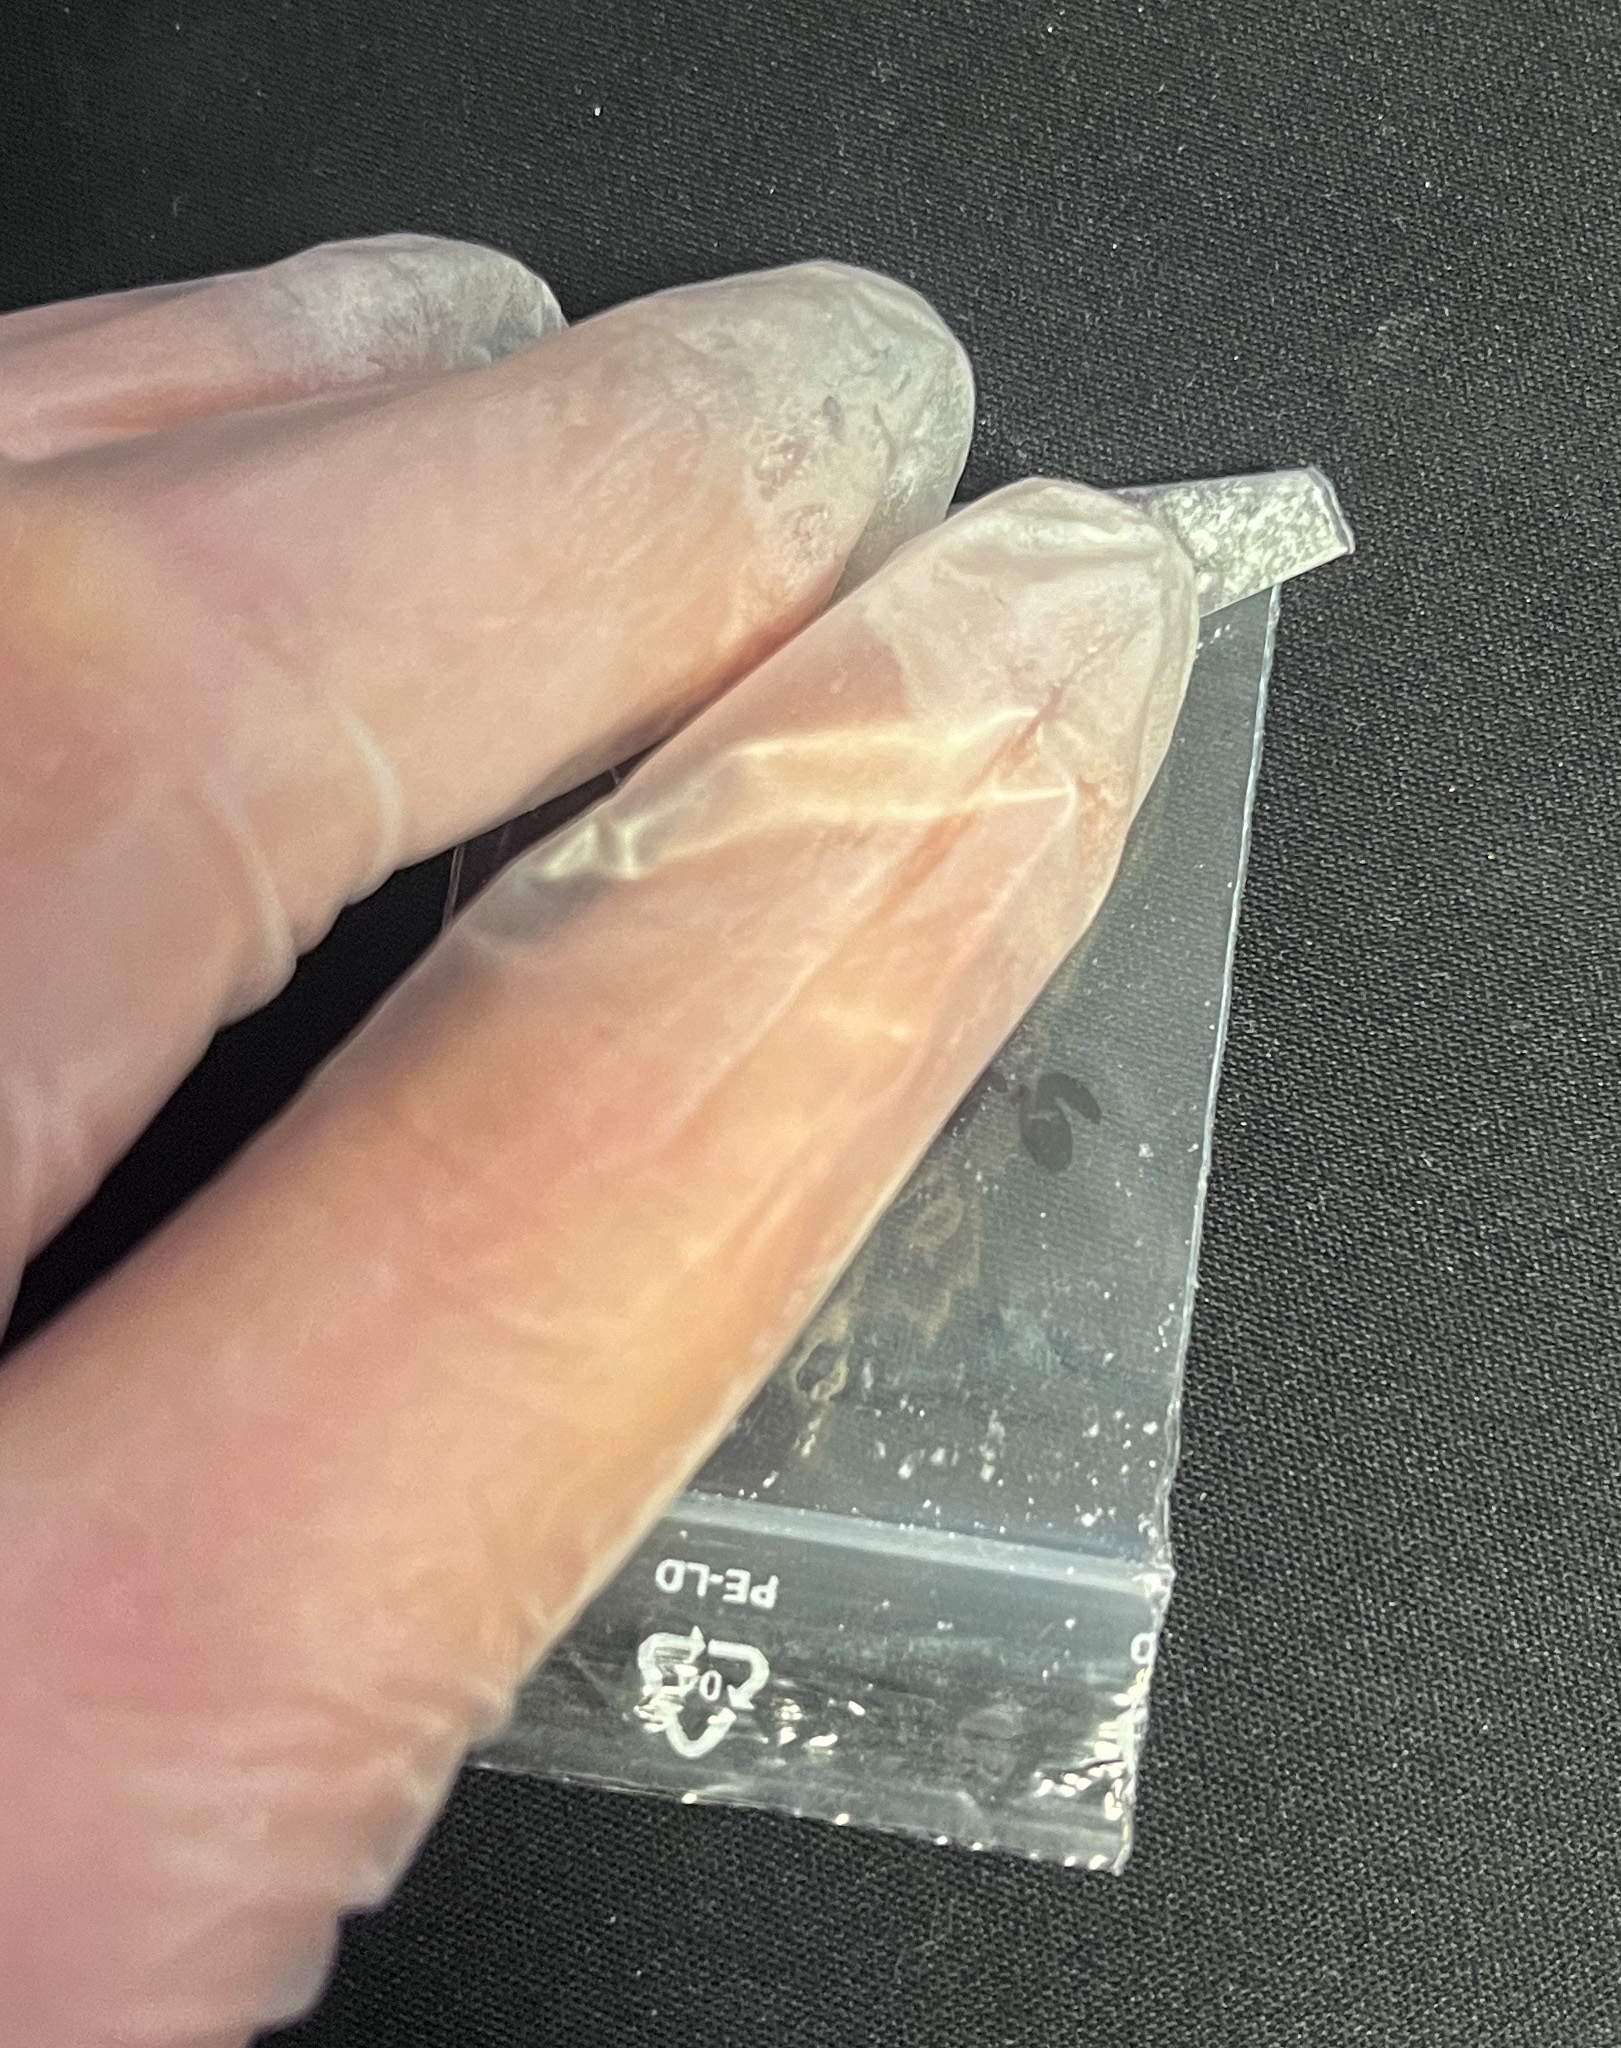
- Shake the Bag: Shake the bag to gather the substance in one corner, facilitating proper positioning.
- Fold the Bag Corner: Fold the corner of the bag containing the substance to prevent the instrument’s weight from displacing it from the analyzing beam.
- Handle Substance Grains Carefully: When working with substance grains, such as table sugar, ensure they are not pushed away, preventing the analyzing beam from missing the sample.
- Position Small Volume Adapter: Finally, position the Small Volume Adapter over the corner of the bag containing the substance for accurate analysis.
For a visual guide, refer to the accompanying image illustrating these steps.
FIRMWARE UPDATE
How often are firmware updates released, and how can I obtain the latest version?
We continuously enhance existing features, develop new functionalities, and provide multi-language support in the user interface. These improvements are released as firmware updates for all our customers. This is an ongoing process, and updates are made available regularly.
New releases are available 2-4 times a year. To get the newest version you contact your local Serstech partner.
How to upgrade your Serstech Arx instrument?
We recommend using ChemDash for the upgrade process. Watch the video tutorial here.
Follow these steps:
ChemDash:
- Download the update file to your PC.
- Open ChemDash and connect the instrument.
- Go to the Devices section and select the instrument.
- Click on the three dots on the right of the selected instrument and choose “Update Firmware.”
- Find the saved file on your computer file (i100-Arx-REL-xxxxxxx.tar.gz.gpg) by clicking the “Select file” button.
- A pop-up in ChemDash confirming the successful firmware update.
- Once the new firmware file is selected, click the “Upload firmware” button.
- Restart the instrument by pressing the power button on the instrument, and selecting ‘Restart’ to initialize the installation of the copied update file.
Note: Keep the cable connected to both the instrument and the computer during the entire process.
From PC to Arx or Arx mkII:
Note: Make sure the instrument has more than 50% battery before proceeding with the update.
- Download the update file to your PC.
- Turn on the instrument and connect it to the PC using the supplied USB cable.
- Log on to the instrument, go to System, then Settings in the menu.
- Navigate to USB and select On; this makes the instrument appear as a USB drive on your PC.
- Double-click to open the drive, and you should find three folders: Update, logfile, and config.
- Copy/drag the update file
(i100update-REL-xxxxxxx.tar.gz.gpg) or (x.x.x- xxxxxxxx-xxxx-arx2.mender)
from your PC to the Update folder of the instrument window. - Restart the instrument by pressing the power button and selecting Restart to initialize the installation of the copied update file.
Note: Keep the cable connected to both the instrument and the computer during the entire process. - When the instrument restarts, go to System -> About where you can see the new firmware version.
FIRMWARE UPDATE PROBLEMS
What should I consider if the instrument is encountering issues during an update?
- Ensure Adequate Battery Level: Before initiating updates, ensure the instrument has a minimum charge of 50% (around 3.7V). Updates may fail if the battery level is below this threshold If the update fails due to low battery, recharge the instrument fully before attempting the update again.
- Maintain USB Connection: Keep the USB cable connected to both the instrument and the computer throughout the update process. Disconnecting the cable prematurely introduces a risk and may lead to update failure. Ensure the cable remains connected until the instrument has successfully restarted.
- Allow Sufficient Time: The update process requires sufficient time to complete successfully. Avoid rushing or pressing buttons during the update to prevent failure. Allow the update to proceed without interruption for a smooth and successful outcome.
- Check File Authenticity: Ensure the updated file being used is the original version downloaded. If the file has a numeral (1) added to its name, it might indicate accidental duplication. Using the correct, original version is crucial for a successful update.
CALIBRATION
Why is regular calibration essential for Serstech instruments?
A calibration check for Serstech instruments is important to ensure that their measurements are accurate and aligned with established standards. Regular calibration checks help maintain reliable results, comply with industry standards, reduce errors, and increase confidence in the instrument’s performance. It’s a proactive step to verify that the instrument is functioning correctly, providing accurate data for better decision-making and maintaining its overall effectiveness over time.
How do I address a ‘Calibration check failed’ message on the instrument?
If you encounter a ‘Calibration check failed’ message, follow these steps:
- Check Cap Positioning and Cleanliness:
Ensure the cap is correctly positioned on the instrument. Inspect both the interior of the cap and the lens for any dirt that could block or get in the way of the laser inside the instrument and disrupt the calibration process. Clean the lens with a cotton pad and isopropanol if necessary. Regular cleaning is recommended for optimal performance.
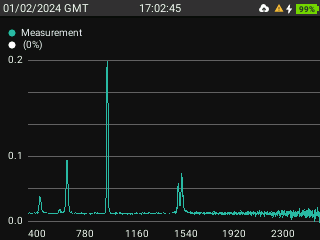
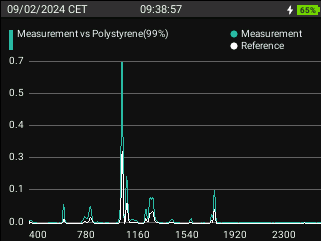
- Verify Polystyrene Spectrum: Conduct a scan using the current cap and verify the obtained Polystyrene spectrum. Refer to the provided image for the desired Polystyrene spectrum appearance.

- Try an Alternate Calibration Cap: If available, attempt calibration using an alternate calibration cap. A successful calibration with a different cap suggests that the existing cap might be damaged, potentially compromising calibration quality.
- Perform Settings Reset: If issues persist, consider performing a “Settings reset” by navigating to System -> Settings -> Setting reset.
- Update to the Latest Firmware: Lastly, update the instrument to the latest firmware version. Obtain the latest firmware update from our local partner. Keeping the instrument updated contributes to optimal functionality.

FUNCTIONALITY AND MANAGEMENT
What is the orange icon at the top of the instrument screen?
Calibration icon
The orange icon means the instrument needs calibration. Perform the calibration with the polystyrene cap as instructed in Calibration section.
What does Factory Reset mean?
A factory reset wipes all data, including measurements, Local libraries created by the user( not factory libraries that were included or purchased), and user profiles from the instrument. It reverts all settings back to their original state as they were when the instrument was first shipped.
To perform a factory reset go to “System” then “Settings” and select the Factory reset button to proceed.
What does Soft Reset/ Setting reset mean?
A soft reset or setting reset acts as a system check to confirm the proper functioning of all settings. Consider it a system repair that ensures the correct configuration.
The Settings reset restores settings to default, including Wi-Fi setup, user permissions, nominal battery capacity, etc. However, it does not impact the scan history or locally created libraries.
To perform a Setting reset, go to “System” then “Settings” and select the Setting reset button to proceed.
How can I view or delete my measurements?
You can select the ‘Scan history’ option from the start menu and then view the measurements performed. You can select a single measurement and then either delete or view it from the options.
How can I manage inconclusive results?
If you encounter an inconclusive result that you need to identify later, follow these steps:
- On the instrument, add a Label for the scan information.
- When transferring substances to ChemDash, select the Label from the visible columns.
- This allows you to easily locate and recognize the inconclusive result. You can also rename it for better organization if added to a Library.
TROUBLESHOOTING
Why does the instrument keep rebooting and remain stuck on the Serstech logo screen?
- Check Battery Level: This issue most often stems from a drained battery. Try changing the instrument overnight and see if this resolves the problem.
- Verify Charger Functionality: If this does not resolve the issue, make sure that the charger is working the way it should, or try a different charger.
- Issue after Firmware Update: If the problem occurred after a firmware update, it might be due to a faulty update process, possibly interrupted or performed with minimal battery life. Follow the recommended Firmware update problem mentioned above and attempt to restart the instrument again.
How can I address battery and charging issues with my instrument?
This issue may indicate that the instrument displays an incorrect battery percentage compared to the actual voltage, often linked to a firmware-related problem. For example, a correct battery level shows 100% and approximately 4.20V, while an incorrect level might display 0%, even with a full voltage of around 4.20V.
To resolve this issue, follow these steps:
- Check the instrument’s current firmware version. If a newer version is available, update the instrument using the latest firmware from our local partners.
- Perform a ‘Settings reset’ option in the ‘Settings’ menu.
- After the instrument restarts, charge it using the USB cable and the charger adapter for at least 8 hours. Overnight charging is recommended for optimal results.
- After charging overnight, check the battery levels on the instrument once more. Go into ‘Settings’ -> ‘About’ and then scroll down to the bottom of the screen. Check the battery values and make sure that the percentage and the voltage are on an even level.
- If they are still not on an even level, try performing a settings reset once more.
What should I do if the instrument remains in measurement mode while scanning?
This issue may arise due to overheating, often caused by prolonged measurements or challenging sample runs. To resolve this problem, please consider the following steps for monitoring the detector and instrument laser temperature:
- Navigate to the ‘Settings’ menu and proceed to ‘About’ and scroll down to the very bottom of the ‘About’ screen.
- Check the current laser temperature displayed. If the laser temperature higher than around 34-35 °C , it is advisable to allow your instrument to cool down by resting it for a while.
- If the temperature is within the recommended range and you still encounter issues with performing measurements, after letting the instrument rest for a while, consider performing a Setting reset.
- After the instrument has restarted, perform a calibration check, and attempt to make a measurement once again.
What steps should I take if I encounter challenges with measurements following a firmware update?
f you encounter difficulties with measurements after a firmware update, follow these steps to address and resolve the issues:
- Perform Calibration Check: Ensure to perform a calibration check after the firmware update, as it is essential for proper functioning.
- Verify Firmware Version: Check the firmware version by navigating to ‘System’ -> ‘About.’ This will confirm whether the firmware update was successful.
- Redo Update if Necessary: If the update failed, and you still see the old version, redo the firmware update.
- Issues with CWA Library: If you encounter issues while using the instrument with the CWA library selected, consider deselecting the CWA library to allow the instrument to function successfully without spectra from the CWA library. If you still wish to use the CWA library, contact our support team for further assistance.
What should I do if the laser is not starting or working?
- The laser may not be starting due to various reasons, such as the instrument being too cold or too hot. In such cases, allow the instrument to warm up or cool down before attempting a measurement. Give it the necessary time, and it should start working after a brief period.
- If the instrument feels warm or has been extensively used, it may need a few minutes of rest. Check the laser and detector temperatures in the system info; let the instrument rest.
- Preform a Setting reset to see if it resolves the issue.
- If the laser persists in not starting, consider updating to the latest software version to eliminate potential bugs.
How can I troubleshoot a non-functional USB connection?
- Verify the integrity of the USB cable. Ensure that the cable you are using is not damaged.
- Confirm that the cable is securely and correctly connected to both the instrument and the computer.
- If the issue persists after the above steps, consider trying a different USB-C cable to rule out a faulty cable.
- In some cases, the instrument may become stuck in “Pair mode.” To address this, perform a soft reset of the instrument and then attempt the USB connection once more.
CONTACT SERSTECH
How do you manage Support?
Serstech has close relations with sales partners around the world. They are responsible for front line support and – in cooperation with us – provide dedicated local support.
Where can I buy Serstech Arx instrument?
Please check under Contacts to find a sales partner near you. If there is nobody in your location or if you are interested in becoming a sales partner yourself, please contact Johan Raneke, VP Business Development , johan.raneke@serstech.com.
What additional services does Serstech offer?
We offer consulting services such as training or measurements to support the early phases of your project. You’re welcome to contact us, or any of our sales partners for more information.